

Daylily care
Daylilies are easy perennials to grow and will reward you for many years. A little extra attention will produce vigorous plants and more bloom. Cultural conditions during the previous fall may have a big effect on a daylily's performance the following season.
Steps to success
- Choose daylilies suitable for your climate.
- Select a good site with at least six hours of sun.
- Prepare the soil before planting.
- Fertilize according to soil requirements.
- Water and weed as needed.
- Apply mulch to conserve moisture and prevent weeds.
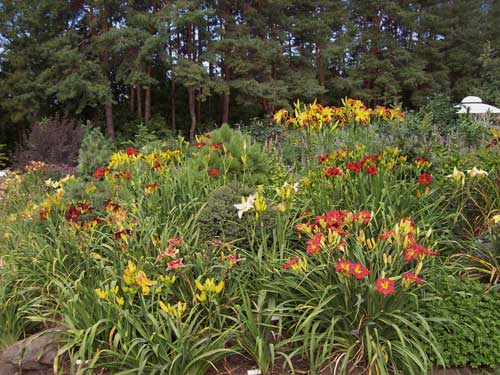 Choose cultivars appropriate for your climate, give them at least six hours of sun, and water as needed. Watch them explode with color! Photo by Don Unruh (used with permission).
Where to plant daylilies
Choose a site with at least six hours of sun each day for best scape (flower stem) production and flowering. Daylilies will survive in less sun, but they will not bloom as profusely.
Daylilies will grow in clay to sandy soils, and there are advantages to each. A lighter soil makes it easier to dig and divide the plants but may require additional fertilizer and water. A heavier soil will retain more nutrients and hold moisture during dry spells. Daylilies seem to prefer a pH of 6.0-6.5.
Work the soil to a depth of one foot or more before planting. Incorporate organic matter to improve tilth and microbial activity. Well-composted manure of all types (such as horse, steer, chicken, turkey, etc.), peat moss, and other organic materials are some favorite soil amendments.
Planting depth and spacing
- Plant daylilies so the crown is about 1-2" below the surface of the soil.
- If the crown is planted deeper than recommended, bloom may be delayed.
- Space daylilies at least 18" apart. Allow 2'-3' spacing for taller varieties.
- For planting instructions, see How to Plant.
Watering established daylilies
Daylilies thrive with ample water--about 1" per week once they are established--especially during spring and again in the fall. Heavy watering during extended periods of high temperatures in mid-summer may lead to crown rot and should be avoided. Daylilies will tolerate some drought once established, but bloom and foliage production will be reduced.
Summer mulch
Apply a light mulch around the base of the plant during summer to retain moisture and prevent weeds. Use wood chips, shredded bark, clean straw, pine needles, marsh hay, or other organic material. Some growers place a barrier of several layers of newsprint under the mulch to help prevent weeds. Rock mulch is not advisable for daylilies.
Deadheading and scape removal
Deadheading refers to removing spent flowers from the scapes. Some growers prefer to deadhead to keep the garden looking neat and tidy. Other growers prefer a more natural approach and let nature take its course.
To deadhead, use a gentle snapping motion with thumb and finger. You may use a small scissors to cut away the spent bloom. Wear disposable gloves to avoid staining your fingers. Collect spent blooms in a bucket and add to the compost pile.
You may also want to remove spent scapes to keep the garden looking neat. If the scapes are still green, cut them several inches above the crown to remove. As scapes age, they will turn brown and eventually pull easily from the crown. If the scapes do not pull away easily, continue to cut them instead, as pulling hard can injure the crown and make it vulnerable to pathogens.
Winter preparation
Plant your daylilies so they have four to six weeks of growing time before the first hard frost.
Continue to water if there is not adequate rainfall.
Winter mulch (such as marsh hay, clean straw or pine needles) provides insulation from severe cold, keeps the ground frozen during winter thaws, and prevents plants from emerging too early in the spring.
It is a good practice to mulch all new perennials for their first winter in a cold climate, such as in hardiness zone 4. Apply protective winter mulch after a hard freeze but before temperatures drop close to zero° F or colder. If you have adequate snow cover, mulch may not be necessary.
Many hardy daylilies will survive and thrive without ever using a protective winter mulch!
Some growers prefer to cut back foliage and scapes before winter to reduce foliar diseases and have a cleaner garden in the spring. In areas with severe winters, retaining foliage and scapes may help trap snow for better winter insulation. Choose the approach that works best for your area.
Spring care
If you applied a winter mulch, remove it gradually as the weather warms and days lengthen. We begin to remove winter mulch around the end of March in our gardens.
Freeze-thaw cycles can damage to crowns. Do not uncover too early, because winter mulch will help keep the ground frozen until the danger of hard freezes is past. Light spring frosts are not harmful, but keep mulch handy in case a sudden cold snap is predicted.
It is just as important to remove mulch once the weather is consistently warm, as high temperatures under heavy mulch can overheat the plants and cause rot.
Early spring is a good time to clean up old foliage and scapes.
Fertilizing
Some growers do very little fertilizing, while others like to apply a balanced fertilizer at planting and early in the spring. Daylilies appreciate nitrogen, and some growers use lawn fertilizer as a source (do NOT use the type with broadleaf weed herbicide!). Have periodic soil tests for best results.
Many growers consider alfalfa pellets to be an ideal organic fertilizer. Work a handful of alfalfa into the soil around the plant in early spring for good results, keeping alfalfa from direct contact with roots. Fish emulsion fertilizers are another excellent organic choice.
Rebloom
Due to our short growing season, rebloom in the North is often unreliable. One factor that seems to improve Northern rebloom is ample water during spring. Other cultural and seasonal conditions may also play a role.
Northern breeders look for seedlings that produce new scapes while the early scapes are still in bloom, known as “instant rebloom.” This characteristic helps contribute to a longer bloom time, so it is valuable for the short growing season in the North. You may want to look for “instant rebloom” in daylily descriptions if you want daylilies that rebloom.